|
|
我之前跟住r33上的benngcp 師兄, 做過這個 custom build 給我的 Cubieboard2. 我把當中的步驟放在我的 blog 上, 因為收到有在大陸的師兄不能看到我的 blog (我不知道他如何得知我個 blog 但又看不到), 我現在把它轉貼一次在此:
參考自:
http://www.review33.com/avforum/ ... opic=70130726214918
1. Follow the guide in https://github.com/cubieplayer/cubian/wiki/Install-Cubian, download Cubian (Cubian-base-r4-arm-a20.img.7z) in here: http://cubian.org/downloads/

2. Load to a micro SD card using Win32 DiskImager:
http://sourceforge.net/projects/win32diskimager/
3. Insert the micro SD card, LAN cable and power up.
4. Login, the default username and password are both "cubie" (no double quotes)
5. After login, you can reset the root password:
#sudo passwd root
(enter new password twice)
6. Then su to root and set correct time & timezone:
#su -
(enter the new password that you just assigned in step 5)
#dpkg-reconfigure tzdata
select the correct region and country, it will show you the local and UTC time.
If the date is incorrect, set it like:
date -s "7 FEB 2014 18:00:00"
7. Refresh package database:
#apt-get update --fix-missing
Note that:
It would take about 5-10 minutes, depends on your network bandwidth.
Press "enter" key for all the questions.
Below step is optional:
#apt-get upgrade
8. Get required softwares
#apt-get install libnl1 libnl-dev libssl-dev wpasupplicant bridge-utils curl wget dkms build-essential unzip ncurses-dev uboot-mkimage libusb-1.0 libusb-dev pkg-config
It would take about 5-10 minutes, depends on your network bandwidth.
Press "enter" key for all the questions.
Additional 150MB disk spaced is required.
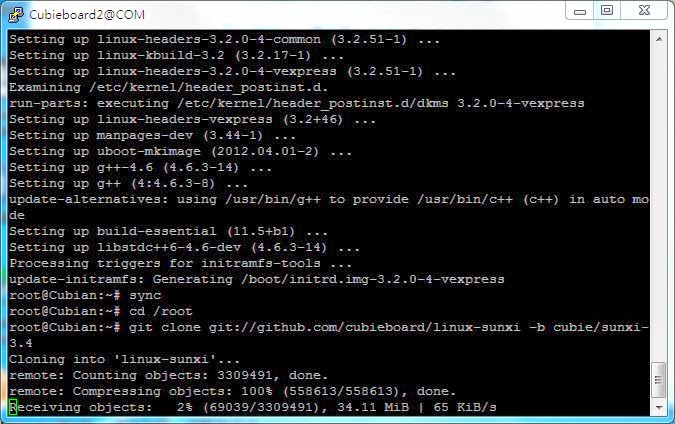
9. Get the sunxi kernel source
#cd /root
#git clone git://github.com/cubieboard/linux-sunxi -b cubie/sunxi-3.4
It would take an hour or longer, depends on network condition.
Additional 2GB disk spaced is required. (1GB download size, 1.7GB after decompression)
10. Modify kernel source (avoid compile error related to power management)
#cd /root/linux-sunxi
#nano arch/arm/mach-sun7i/pm/standby/mem_printk.c
(Use Ctrl+W to search by text, use Ctrl+C to show current row number)
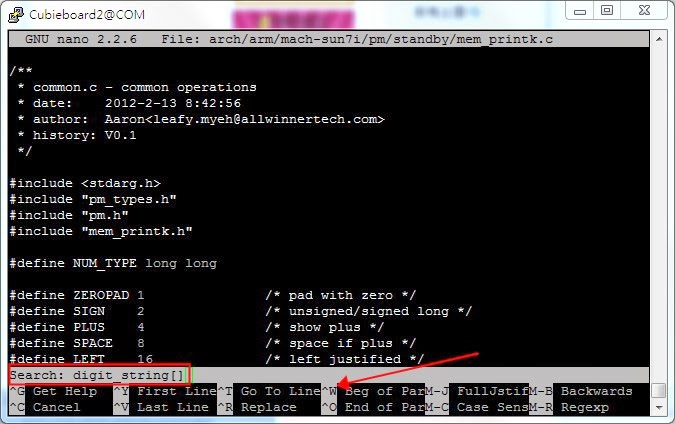
10.1 goto line 168:
change: char digit_string[] = "0123456789ABCDEF";
to: char* digit_string = "0123456789ABCDEF";(add "*" and remove [])
Before:
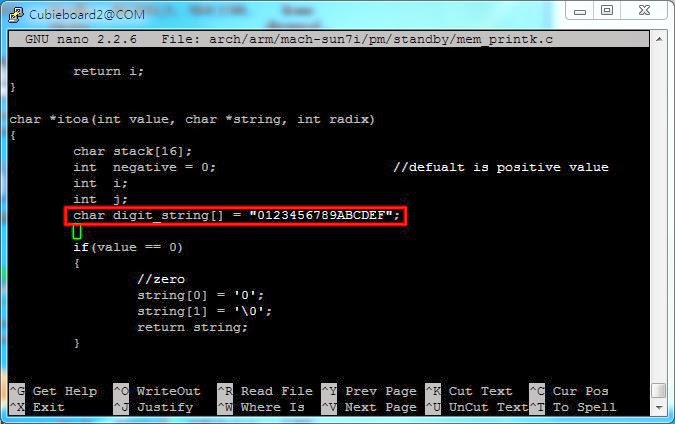
After:

10.2 goto line 213:
change: char digit_string[] = "0123456789ABCDEF";
to: char* digit_string = "0123456789ABCDEF";(add "*" and remove [])
10.3 goto line 369:
change: char fill_ch[] = " ";
to: char* fill_ch = " ";
(add "*" and remove [])
Save and exit (Ctrl+X, enter Y and press enter key again)
11. Download Realtime Patch 3.4.61
#wget https://www.kernel.org/pub/linux ... .4.61-rt77.patch.xz
#unxz patch*
12. Apply the patch:
#patch -p1 < patch*
It shall take less than 10 seconds to complete.
13. Modify "fs/timerfd.c"
#nano fs/timerfd.c
goto line 388, change
hrtimer_wait_for_timer(&ctx->tmr);
to:
hrtimer_wait_for_timer(&ctx->t.tmr);
14. Get the cubieboard specific kernel configuration default values and open the kernel configuration menu page:
#git clone git://github.com/cubieboard/cubie_configs
#cp cubie_configs/kernel-configs/3.4/cubieboard2_defconfig .config
#make menuconfig
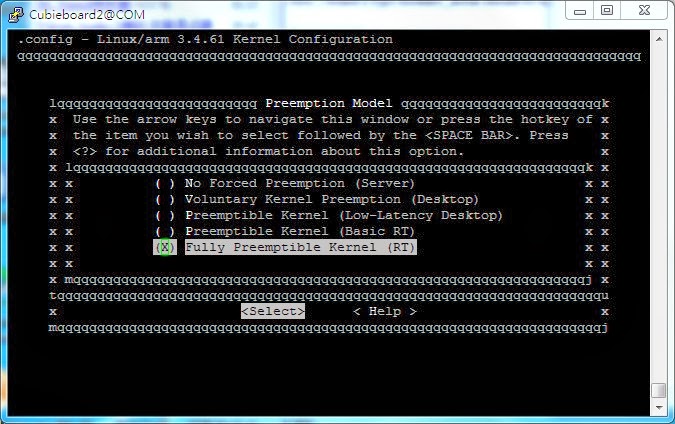
15. Do the following changes inside the menu:
15.1 Kernel Features -> Memory Split -> (change to) 1G/3G user/kernel split

15.2 Kernel Features -> Preemption Model -> (change to) Fully Preemptible Kernel (RT)
15.3 CPU power management -> CPU frequency scaling -> Default CPUFreq governor
(change to "performance")
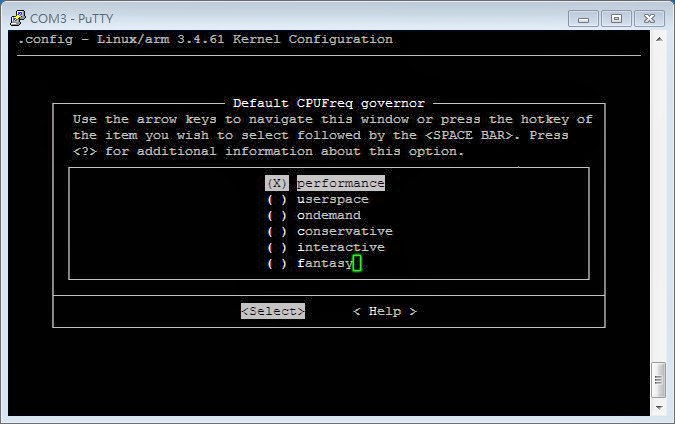
(Exit and save the configuration)
16. Make the kernel
#alias make='make -j2'
#make
("-j2" means running the process in two threads, this could better utilize the CPU if your computer has multiple CPU/cores. Cubieboard2 is dual core, so using j2 will fully utilize the two cores)
The make process would take over an hour, if there is no error. Be patient...
Make sure the make process complete without error. If there is error, try to look at the cause of error, if it is something look familar that you've modified before, may be there was typo. If there is something new, try copy and paste the cause (file name, line number, error description) and search. Someone may have faced the same problem before.
(optional) Do a disk cache write back to avoid data loss due to accident:
#sync
17. Make the boot image
#make ARCH=arm uImage
The make process would take about 30 minutes if there is no error, be patient
(optional) Do a disk cache write back to avoid data loss due to accident:
#sync
18. Now we can work on the Mubox. Take another micro SD card (4G or larger), put it into a card reader and connect to Cubieboard2. It should be mounted as /dev/sdb1 if there is a partition.
19. Setup Mubox on this SD card (in card reader), just follow the official setup guide in here:
http://mubox.voyage.hk/cubieboard2
The SD card should be in /dev/sda (before partitioning) and /dev/sda1 (after partitioning and formating). So just replace those "/dev/sdX" with "/dev/sda" and "/dev/sdX1" with "/dev/sda1".
20. Now you should have this SD card in card reader loaded with Mubox, mount it in /media/voyage-mubox. Just unplug the card reader and re-insert it. The system shall auto mount it into /media/voyage-mubox. If not, run the following command manually
#mkdir /media/voyage-mubox
#mount /dev/sdb1 /media/voyage-mubox
21. Copy uImage & kernel modules
(optional, backup before copying)
#cp /media/voyage-mubox/boot/uImage /media/voyage-mubox/boot/uImage.old
#cd /root/linux-sunxi
#cp arch/arm/boot/uImage /media/voyage-mubox/boot
#make modules_install INSTALL_MOD_PATH=/media/voyage-mubox
24. Generate the boot up script #cd /root
#git clone git://github.com/cubieboard/sunxi-tools
#cd /root/sunxi-tools
#make
#cd
#cp /root/linux-sunxi/cubie_configs/sysconfig/linux/cubieboard2.fex .
#nano cubieboard2.fex
(modify the usb detect type from 1 to 0 to solve the CPU overload problem, search "usb_detect_type=1")
[usbc0]
usb_detect_type=0
Save and exit
#./fex2bin cubieboard2.fex /media/voyage-mubox/boot/script.bin
25. Done, power off and put the SD card in card reader to the SD card slot of Cubieboard2:
#sync
#poweroff
Then power on again, you shall see Mubox login, enter username=root, password=voyage to login. You may want to set the correct timezone again (on this SD card):
#dpkg-reconfigure tzdata
select the correct region and country, it will show you the local and UTC time.
If the date is incorrect, set it like:
date -s "7 FEB 2014 18:00:00"
Extra steps (for those who've completed all the above)
If you want to install the Mubox onto NAND drive, do the below steps.
101. Boot up Mubox SD-card and login (username: root, password: voyage)
(now run the below using the "root" account)
102. Add Cubian APT source:
#wget -O cubian.key http://packages.cubian.org/cubian.gpg.key
#apt-key add cubian.key
Edit /etc/apt/sources.list
#nano /etc/apt/sources.list
and add this line (anywhere)
Save and exit
103. Install required tools:
#apt-get install cubian-nandinstall dosfstools cubian-resizefs
104. Fix the "cubian-nandinstall" script:
#nano /usr/sbin/cubian-nandinstall
Find the line
echoRed "!!! This tool must be run on SD-card system"
Remove the "exit 2" line below that line.
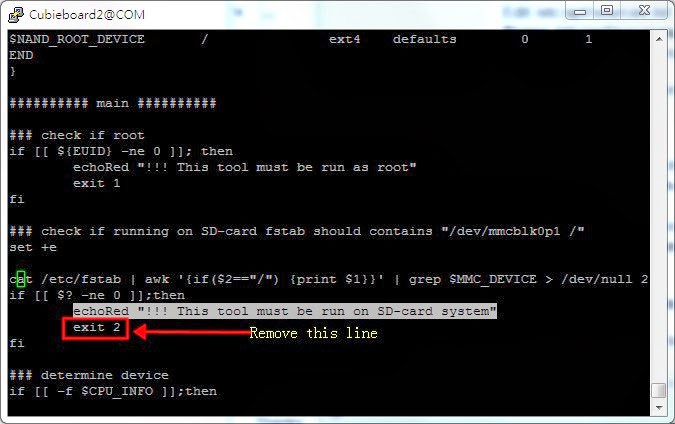
Save and exit.
105. Run the copy script, it will erase your NAND drive and copy the content on SD card (mubox) to the NAND drive.
#cubian-nandinstall
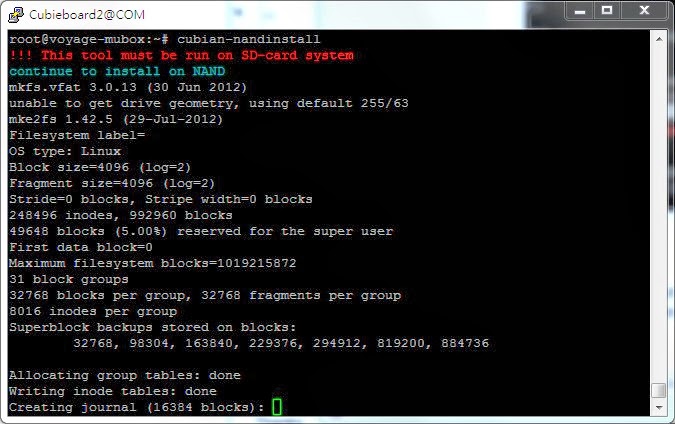
poweroff, remove the SD card and power on again. It should boot from the NAND now. |
評分
-
6
查看全部評分
-
|


 IP卡
IP卡 狗仔卡
狗仔卡 發表於 2014-4-24 10:35:48

 提升卡
提升卡 置頂卡
置頂卡 沉默卡
沉默卡 喧囂卡
喧囂卡 變色卡
變色卡 顯身卡
顯身卡
 發表於 2014-4-24 14:57:09